
TORN PAPER
Step 1
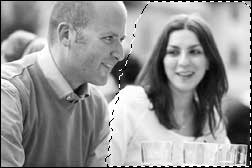
Open Photoshop. Open the image to create Torn Paper.

Step 2
Choose the lasso tool (L) and draw a ragged selection line .

Step 3
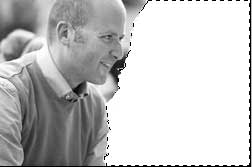
Go to Edit -> Fill -> White color (or Shift+ F5).
Step 4
Inverse selection: Select -> Inverse (Shift+Ctrl+I).
Copy the contetns on a new layer by choosing Edit -> Copy (or Ctrl + C) and Edit -> Paste (or Ctrl + V). Photoshop will automatically paste it into a new layer.
Copy the contetns on a new layer by choosing Edit -> Copy (or Ctrl + C) and Edit -> Paste (or Ctrl + V). Photoshop will automatically paste it into a new layer.

Step 5
Make a new selection close to the edge.
Copy the contetns on a new layer: Edit -> Copy (or Ctrl + C) and Edit -> Paste (or Ctrl + V).
Copy the contetns on a new layer: Edit -> Copy (or Ctrl + C) and Edit -> Paste (or Ctrl + V).

Step 6
Select the contents of the new layer by Control-clicking on it.
Apply Filter -> Render -> Clouds.
Go to Image -> Adjustments -> Brightness/Contrast. Increase the brightness and decrease the contrast until you get satisfying result.
Apply Filter -> Noise -> Add Noise. Amount: 9%; Distribution: Gaussian; Monochromatic.
Deselect (Ctrl+D).
Apply Filter -> Render -> Clouds.
Go to Image -> Adjustments -> Brightness/Contrast. Increase the brightness and decrease the contrast until you get satisfying result.
Apply Filter -> Noise -> Add Noise. Amount: 9%; Distribution: Gaussian; Monochromatic.
Deselect (Ctrl+D).


Step 7
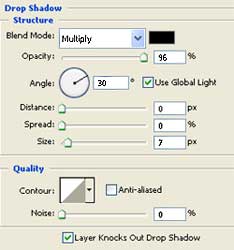
You can add Drop Shadow on your picture layer using these settings:

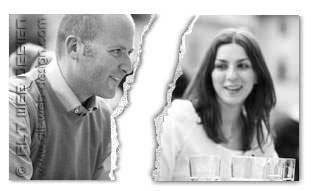
You’re finished!
Thanks so much! Your tut is the best I’ve seen on line thus far.
You’re welcome! 🙂
Thanks for the help. I agree yours is the best. I have tried to follow others and not so easy. Thanks again.
Excellent, the best tuto on the web. Thank you 🙂
Hi, I’ve created a similar torn paper effect using a vector mask and I got similar results from your tutorial as well. Very helpful, thank you! However, with both effects I’m curious if there is a way to swap out the pictures easily so that I get the same rough edge for every picture. If creating a webpage using this rough edge as a border…it will be hard to duplicate the same effect. Any suggestions would be great. Thank you!