GLASS BUTTON photo shop tutorial
Step 1

Create a new document (File -> New), then create a new layer and select the Rounded Rectangle Tool (radius is 5px) and draw a shape of your button and fill it with a solid colour.
Step 2
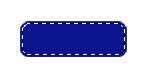
Select the fill colour, go to Select -> Modify -> Contract. Contract the selection by 2 pixels.
Step 3

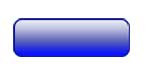
Create a new layer. Choose white as foreground color. In the gradient palette set the fill to Foreground to Transparent. Click and drag from the top of the selection area, and holding down the SHIFT key to hold a straight line, drag to the bottom of the button.
Step 4

Set the opacity of the layer to 90%.
Step 5
Create a new layer. Choose your fill colour as foreground colour. In the gradient palette set the fill to Foreground to Transparent. Click and drag from the bottom of the selection area, and holding down the SHIFT key to hold a straight line, drag to the middle of the button. Deselect.
Step 6
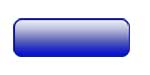
Set the layer mode to color dodge and the opacity to 60%.
Step 7
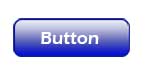
Add your text to the button.